Saturday, 7 January 2017

AX Retail POS Permissions And Operation


To get started, lets first define each of the 3 entities:
  1. Operations – These are the tasks that employees perform at the POS, assigned with a Permission
    1. Retail >> Setup >> POS >> Operations
  2. Permissions – These are the ID’s associated to the fields on the Permission group form.
    1. Retail >> Setup >> POS >> Operations >> Right click on the Permission ID field, click View details
  3. Permission groups – A set of enabled/disabled Permissions that can be assigned to each Worker
    1. Retail >> Setup >> POS >> Permission groups
How To Linked with Each Other

On the Permission group form, there is an option for “Allow create order”.  When marked the cashier with this permission group can create customer orders at POS that also creates orders directly in AX. If we open the Operations form, you will see that Operation ID 620 is for Create customer order and this has a Permission ID listed is 1020.  Right click on 1020 and select View Details. This will open the Permissions form and you will see that 1020 relates to allowCreateOrder. If you look at the Operations list again, you will see that Operation 621-Create quotation also has Permission ID 1020 listed.  What this means is when you place a checkmark next to the field “Allow create order” on the Permission group form, you also gain access to “Create quotation”. 


On the Operations form you will notice that many of the Operations are listed with Permission ID’s of 0.  This means that everyone has access to perform those functions.  If you would like to limit these operations you can choose a Permission ID from the dropdown to associate it to a field on the Permission group form such as Manager Privileges. 
The Permission ID and Permission ID2 fields allow you to assign two different Permissions to the operation.  For example, we can set the 500-Void transaction Operation with a permission of 1001-allowTransactionVoiding as well as the 1002-managerPrivileges.  This means 3 things:
  1. If a Cashier Permission group does not Manager privileges or Allow transaction voiding marked, then the cashier will be prompted for a manager override to perform this function.
  2. If a Supervisor Permission group does not Manager privileges marked but does have Allow transaction voiding marked, then the Supervisor is able to perform the Void without a Manager.
  3. If a Manager Permission group has the Manager privileges marked then the Manager is able to perform the Void regardless of the Allow transaction voiding field.
The Operations form also has a Check user access field.  This determines if Retail POS should check a user’s privileges before the operation is performed. If this is not checked and you had Manager privileges set to an Operation, this will just skip the user validation and allow any user to perform the function.
MANAGER OVERRIDE PRIVILEGES

The Manager privileges option can be confusing as one may assume that this means they would have access to all operations.  This is untrue.  Selecting Manger privileges on the Permission group form gives the user access to any Operation that has the 1002-managerPrivileges Permission assigned to it. Normally a manager would have most of the options marked on the Permission group form, thus giving them access to practically all functionality at the POS.  Adding Manager privileges to any of the Operations will prompt a cashier who doesn’t have direct permissions for Manager login approval before continuing. 

OPERATIONS NOT LISTED ON THE PERMISSION GROUP FORM

You may have noticed that there are about 24 Permissions, but there are about 128 Operations.  Many of these are left with Permission ID’s of 0, meaning they are open for everyone to use.  Keep in mind, as a cashier, I probably wouldn’t have access to edit the POS buttons available to me and thus would not have access to all of these Operations such as “Minimize POS” unless someone made that available. 
If you wanted to link additional Operations to the Permission group form, the out of the box solution would be to assign the Permissions in the Operations form to link it to an existing Permission Group field option.  Let’s take the 1017-allowReturn permission and 114 Return transaction Operation.  These are not available on the Permission group form.  If you would like to toggle the access to this Operation, you could link this with another field such as “Allow transaction voiding”.  So for Operation 114-Return transaction, assign Permission ID 1001.  Now if a cashier’s Permission group has the “Allow transaction voiding” marked, they can also process Return transactions.
WORKER PERMISSIONS

The POS permission group is assigned to a worker at the Job level.  To view this through Retail, go to: Retail >> Common >> Workers >> select a worker >> in the right pane, expand Position assignment and click on the hyperlink for the Job >> expand the Job classification fast tab >> view the POS permission group

Monday, 21 November 2016

Error number: 13010 Could not connect to the Transaction Service

“Error number: 13010 Could not connect to the Transaction Service” what means that there is no real-time connection between Dynamics AX 2012 R2 and the Dynamics AX 2012 POS.

This blog explains the steps I took to enable the Retail Transaction Service on the Virtual Machine Dynamics AX 2012 R2 Drop 1, where the transaction service is already installed and configured.
Option 1: verify the Real time service profile settings in Dynamics AX 2012 R2
Start Dynamics AX 2012 (partition initial) and open company USRT (US Retail). Select the option: Retail > Setup > Retail Scheduler > Channel Integration > Real-time service profiles. Verify the settings for Real-time Service profile JBB.
Option 2: verify the used Real-time service profile for your POS
Start the option: Retail > Setup > POS > POS registers and select the Seattle-1 store. Double click and verify if the used Real-time service -JBB- profile is used for this POS Register.
Option 3: push the POS register batch job through the POS systems
Start the option: Retail > Periodic > Data distribution > Distribution schedule. Select job N-1090 and run this job directly. This job pushes the “RetailTransactionServiceProfile” to the POS database.
Option 4: verify the configuration file for the Retail Transaction Service
Open path “C:\Program Files (x86)\Microsoft Dynamics AX\60\Commerce Data Exchange\Real-time Services\6.1\Bin” and select the configuration file “RetailTransactionService.exe”. Open this file with edit and change the value of the object server key to “<add key=”ObjectServer” value=”MicrosoftDynamicsAX@AX2012R2A:2712” />”. Save the file.
Option 5: Restart the Real-time service 6.1
Open the services for the “AX2012R2A” server and select service “Microsoft Dynamics AX Commerce Data Exchange: Real-time Service 6.1″. Restart the service. This service can be set to “start automatically” and it start the “RetailTransactionService executable” from the path above, with the usage of the changed configuration file from step 4.
Option 6: verify the settings of the Commerce Data exchange web service
Open Internet Information Services (IIS) for the “AX2012R2A” server and select the site “CommerceDataExchangeRealtimeServiceWebsite”. Restart this web service via the option “Manage Web Site”.
Option 7: test the Retail Transaction Service
Open the Dynamics AX 2012 POS for store “Seattle 1″ with user “Emma Harris (000137)”. Select the option Sales > Tasks > Inventory >  Inventory lookup. Select option “”Search”, select item “0051″ and push the button “OK”. The inventory for all store is now displayed by using this Retail Transaction Service.
Option 8: Import IIS Certificate
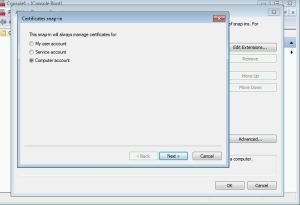
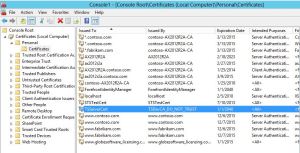
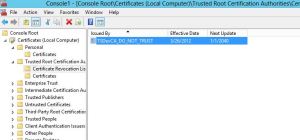
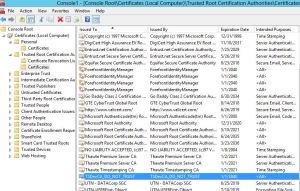
using self-signed certificate, you need export those certificate and revocation list and import them to POS machine.
7
4
5
6


Friday, 14 October 2016

SQL Tricks

How to Find Duplicate Record in the Table :-  Here I am taking InventItemBarCode Table which is having Item Variants Bar-code, Run below query into the SQL will give you record which is having more than one record.

SELECT ITEMBARCODE,ITEMID,[DESCRIPTION], COUNT(1) as Duplicate
FROM INVENTITEMBARCODE
GROUP BY ITEMBARCODE,ITEMID,[DESCRIPTION]

HAVING COUNT(1) > 1;


How to Shrink SQL database logs :- When you are facing Full disk problem in your Database Server Drive  and you don't have any junk files or folder in your Database Server, but system is showing Disk Full, due to this AX will not run and give you error while you run AX Application, Check database logs and run below SQL Query into you SQL,Change the Database name which logs want to shrink.

USE MicrosoftDynamicsAX;
ALTER DATABASE MicrosoftDynamicsAX
SET RECOVERY SIMPLE;
DBCC SHRINKFILE (MicrosoftDynamicsAX_Log, 0);
ALTER DATABASE MicrosoftDynamicsAX
SET RECOVERY FULL;


How to Compare Two SQL Database :-  To compare two SQL Database free utility.


Monday, 12 September 2016

AX Retail Pos Error Number 13000 – Could not load all external service modules

Error number 13000, Error when launching Retail POS: could not load all external service modules


Missing dll in the “C:\Program Files (x86)\Microsoft Dynamics AX\60\Retail POS\Connectors” folder.
From Folder => Copying “Microsoft.Dynamics.Retail.TestConnector.dll” from “C:\Program Files (x86)\Microsoft Dynamics AX\60\Client\Bin\Connectors” 
TO Folder=> “C:\Program Files (x86)\Microsoft Dynamics AX\60\Retail POS\Connectors”

Sunday, 4 September 2016

Getting Error :- Cannot insert multiple records in Security user role (SecurityUserRole). The record already exists.

When Insert Users form System Administration Getting Error :- Cannot insert multiple records in Security user role (SecurityUserRole). The record already exists.


Solution: Open SSMS, SQL DB, Select the MicrosoftDynamicsAX database and run the below query 

Select * from dbo.SecurityUserRole
Delete from dbo.SecurityUserRole Where User_='USERID'

Getting Error When Sync Database Invalid Column Name "DateRequested"

Getting Error When Sync Database Invalid Column Name "DateRequested" in Event Viewer

-----------------------------------------EVENT LOG--------------------------------------------------------------
DataException happenes when updating download session. Error Detail: System.Data.EntityCommandExecutionException: An error occurred while executing the command definition. See the inner exception for details. ---> System.Data.SqlClient.SqlException: Invalid column name 'DateRequested'.
Invalid column name 'DateDownloaded'.Invalid column name 'DateApplied'.
Invalid column name 'Status'.Invalid column name 'Message'. at System.Data.SqlClient.SqlConnection.OnError(SqlException exception, Boolean breakConnection, Action`1 wrapCloseInAction) at System.Data.SqlClient.TdsParser.ThrowExceptionAndWarning(TdsParserStateObject stateObj, Boolean callerHasConnectionLock, Boolean asyncClose) at System.Data.SqlClient.TdsParser.TryRun(RunBehavior runBehavior, SqlCommand cmdHandler, SqlDataReader dataStream, BulkCopySimpleResultSet bulkCopyHandler, TdsParserStateObject stateObj, Boolean& dataReady)

-----------------------------------------EVENT LOG--------------------------------------------------------------

This error getting because of wrong message DataBase settings in Async client settings. Change Async Client Database Selection option Enter new message DB as "Channel Massage Database" as AsyncHoustonMessageDB & select existing store database as Store database option. In Async client settings you may be using Async Server message DB in the message DB option. Use only Store message DB in the Async client settings.