About Sales Agreement
A sales agreement is a contract that commits the customer to buy products in a specific quantity or for a specific amount over time, in exchange for special prices, special discounts, and other special terms, such as payment and delivery terms. The prices and discounts of the sales agreement override the prices and discounts that are stated in any trade agreements that exist.
Sales agreements is that they represent an agreement for specific pricing of an item, a category of items, or all items based on a commitment between a company and an individual customer or vendor.
D365FO, sales agreements form in the Sales and Marketing modules.
- In the navigation pane, go to Modules > Sales and marketing > Sales agreements > Sales agreements.
- Select New.
- In the Customer account field, select the desired record from the drop-down menu.
- In the Sales agreement classification field, select the desired record from the drop-down menu.
- Expand the General section.
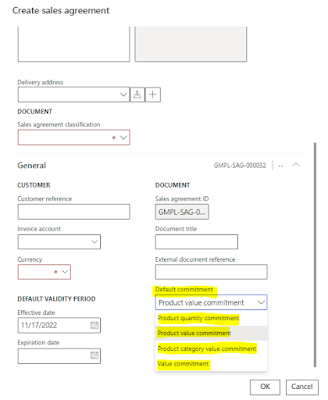
- In the Default commitment field, select Product value commitment. A commitment type is a mandatory criterion that you must assign to the agreement to define how the agreement contract will be fulfilled. The four predefined types let you set up the customer's commitment target, expressed as a quantity or a value. The quantity commitment type can only be applied to a specific product, but the value-based types are applicable to sales of both specific and non-specific products.
- In the Expiration date field, set the date to a future date when you want the agreement to expire.
- Select OK.
Set up product value commitment lines
- Select Add line.
- In the Item number field, select the desired record from the drop-down menu. The type of commitment that you have chosen for the agreement affects the kind of information you can enter for the agreement lines. For example, for a value-based agreement you must specify the total net amount (in the agreed currency) for which the customer commits to buys goods from you. In this example the Quantity and Unit fields on the line are unavailable because you're creating an agreement for the customer to buy a specific value of a product.
- In the Net amount field, enter the monetary amount that the customer has committed to buying.
- In the Discount percent field, enter a percentage value that will apply to the customer's sales order lines that are linked to this agreement.
- Expand the Line details section.
- Select Yes in the Max is enforced field.
- Selecting Max is enforced means that the total amount of all the sales order lines that use the commitment's special prices, discounts and/or payment terms must not exceed the amount specified on the commitment.
- The minimum and maximum release amounts specify a range of values that must be sold on each sales order that uses the selected agreement.
- Expand the Sales agreement header section. Unless the status of the agreement is set to Effective, sales orders cannot be associated with the agreement and can therefore not contribute to the fulfilment of that agreement. You can change the status manually at this stage. However, the status would normally be changed when you confirm the agreement for the customer.
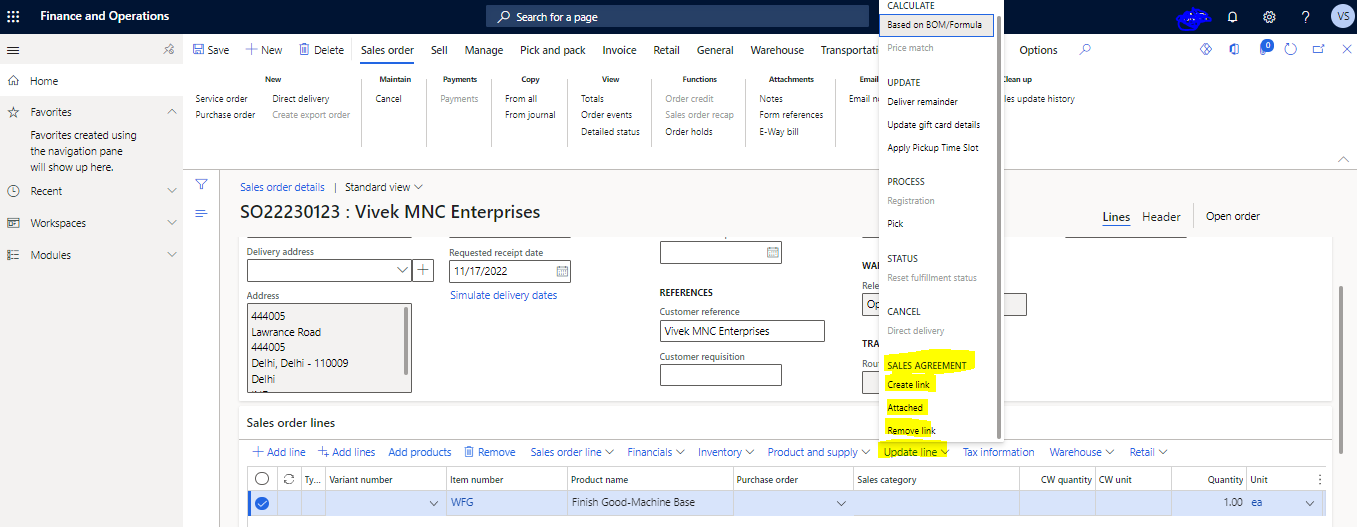
- On the Action Pane, select Sales agreement.
- Select Confirmation. Make sure that the Mark agreement as effective option is set to Yes.
- Select Yes in the Print report field.
- Select OK.
- Close the page. The agreement is now effective. You can start linking the customer's orders to the agreement to offset against the committed target.
Create Sales Agreement
Select a customer for the agreement and classify the agreement in the Sales agreement classification field. This field is used to group agreements together.
Open the General fast tab, a number of new fields become available.
In the Customer reference field you can enter the customer’s agreement reference number, if applicable.
The system automatically fills in the Currency field with the default currency associated with the selected customer. However, this can be overridden for the specific agreement.
In the Default validity period you can enter the period in which the contract is active.
You can enter a title for the agreement in the Document title field and a reference to an external document (the contract) in the External document reference field.
In the Default commitment field, you select what the agreement is for. You have the following options:
Product quantity = The agreement is for a specific quantity of a specific product.
Product value = The agreement is for a financial value of a specific product.
Product category value = The agreement is for a financial value of products within a specific category.
Value = The agreement is for a financial value across all products.
In my example, I create an agreement with a commitment for a specific quantity of a specific product (Product quantity commitment).
If the agreement relates to a specific project, you can select the project in the Project ID field.
Create Sales Order by Sales Agreement
Create a sales order directly from a sales agreement by using the Release order action. Alternatively, you can select an effective sales agreement when you're taking orders.
Create Sales Order by Sales Order
Creating a new sales order and select a sales agreement, the terms of that agreement, such as the payment terms, delivery terms, and delivery address, are applied to the order header, and the link between the agreement and the order is created. Then, on the order lines, when you can select products and categories that are specified in the sales agreement, the prices and discounts are copied from that agreement. The same sales order can include both lines that aren't related to a sales agreement and lines that have a commitment for a sales agreement.
 .
. .
. .
.