“Error number: 13010 Could not connect to the Transaction Service” what means that there is no real-time connection between Dynamics AX 2012 R2 and the Dynamics AX 2012 POS.

This blog explains the steps I took to enable the Retail Transaction Service on the Virtual Machine Dynamics AX 2012 R2 Drop 1, where the transaction service is already installed and configured.
Option 1: verify the Real time service profile settings in Dynamics AX 2012 R2
Start Dynamics AX 2012 (partition initial) and open company USRT (US Retail). Select the option: Retail > Setup > Retail Scheduler > Channel Integration > Real-time service profiles. Verify the settings for Real-time Service profile JBB.

Option 2: verify the used Real-time service profile for your POS
Start the option: Retail > Setup > POS > POS registers and select the Seattle-1 store. Double click and verify if the used Real-time service -JBB- profile is used for this POS Register.

Option 3: push the POS register batch job through the POS systems
Start the option: Retail > Periodic > Data distribution > Distribution schedule. Select job N-1090 and run this job directly. This job pushes the “RetailTransactionServiceProfile” to the POS database.
Option 4: verify the configuration file for the Retail Transaction Service
Open path “C:\Program Files (x86)\Microsoft Dynamics AX\60\Commerce Data Exchange\Real-time Services\6.1\Bin” and select the configuration file “RetailTransactionService.exe”. Open this file with edit and change the value of the object server key to “<add key=”ObjectServer” value=”MicrosoftDynamicsAX@AX2012R2A:2712” />”. Save the file.

Option 5: Restart the Real-time service 6.1
Open the services for the “AX2012R2A” server and select service “Microsoft Dynamics AX Commerce Data Exchange: Real-time Service 6.1″. Restart the service. This service can be set to “start automatically” and it start the “RetailTransactionService executable” from the path above, with the usage of the changed configuration file from step 4.

Option 6: verify the settings of the Commerce Data exchange web service
Open Internet Information Services (IIS) for the “AX2012R2A” server and select the site “CommerceDataExchangeRealtimeServiceWebsite”. Restart this web service via the option “Manage Web Site”.

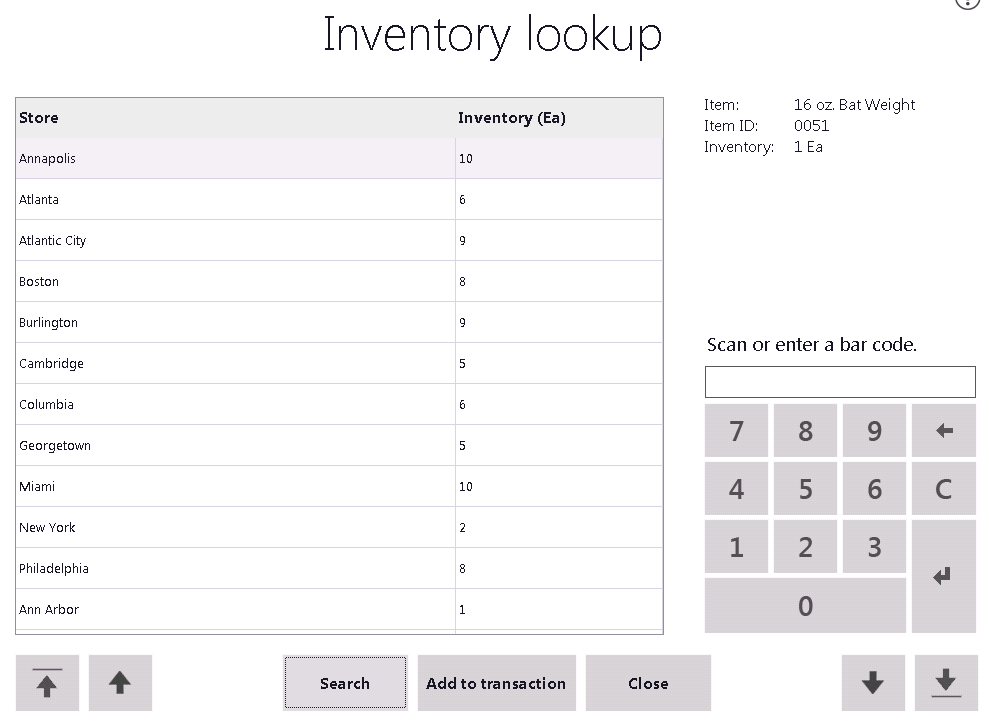
Option 7: test the Retail Transaction Service
Open the Dynamics AX 2012 POS for store “Seattle 1″ with user “Emma Harris (000137)”. Select the option Sales > Tasks > Inventory > Inventory lookup. Select option “”Search”, select item “0051″ and push the button “OK”. The inventory for all store is now displayed by using this Retail Transaction Service.
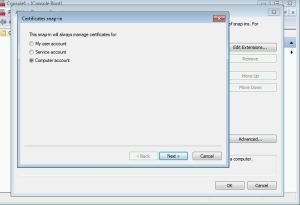
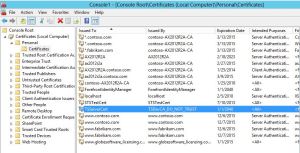
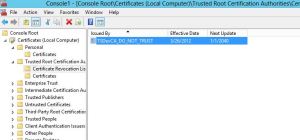
Option 8: Import IIS Certificate
using self-signed certificate, you need export those certificate and revocation list and import them to POS machine.


..JPG)


